
Table of Contents
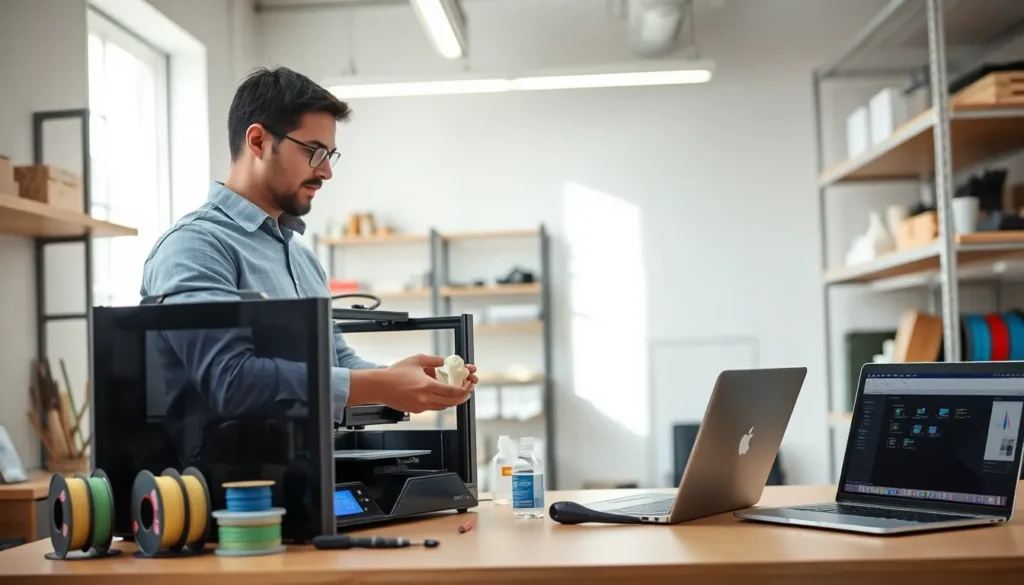
ToggleGetting consistent, high-quality prints requires more than just hitting “start.” These 3D printing tips can help makers of all skill levels avoid common mistakes and produce cleaner, stronger parts every time.
Whether someone is printing their first benchy or running a small production setup, the fundamentals stay the same. Bed adhesion, temperature control, and regular maintenance make the difference between a successful print and a pile of spaghetti. This guide covers the essential 3D printing tips that lead to better results, without the guesswork.
Key Takeaways
- A clean, level print bed is essential for strong first-layer adhesion and prevents warping or print failures.
- Match your temperature, speed, and cooling settings to each filament type—PLA, ABS, and PETG all behave differently.
- Print at moderate speeds (40-60mm/s) for reliable results; faster printing requires temperature adjustments to maintain quality.
- Regular maintenance like cleaning nozzles, lubricating rails, and checking belt tension keeps your printer performing consistently.
- Use temperature towers and retraction tests to fine-tune settings and eliminate stringing or weak layer bonds.
- Troubleshoot common issues like warping, stringing, and under-extrusion by adjusting bed temperature, retraction, or nozzle settings.
Prepare Your Print Bed Properly
A clean, level print bed is the foundation of every successful print. Skip this step, and prints will warp, detach, or fail entirely within the first few layers.
First, level the bed. Most printers use a manual leveling process with a piece of paper. Slide the paper between the nozzle and the bed at each corner. There should be slight resistance, enough to feel friction, but the paper should still move. Auto-leveling systems like BLTouch can simplify this process, but they still require occasional calibration.
Next, clean the surface. Oils from fingerprints cause adhesion problems. Wipe the bed with isopropyl alcohol (90% or higher) before each print session. For glass beds, a quick wipe removes dust and residue that interfere with the first layer.
Adhesion aids help with tricky materials. PLA usually sticks well to a clean surface, but ABS and PETG often need help. Options include:
- Glue stick: Cheap and effective for most materials
- Hairspray: Works well but can build up over time
- Painter’s tape: Good for PLA on non-heated beds
- PEI sheets: Excellent adhesion when heated, easy release when cool
These 3D printing tips for bed preparation prevent most first-layer failures. A solid first layer means fewer wasted prints and better dimensional accuracy throughout the part.
Choose the Right Settings for Your Filament
Different filaments behave differently. PLA, ABS, PETG, and TPU each require specific settings for temperature, speed, and cooling. Using the wrong profile leads to poor adhesion, stringing, or weak layer bonds.
Start with the manufacturer’s recommended temperature range. Most PLA prints well between 190-220°C, while ABS needs 220-250°C. PETG sits somewhere in the middle at 230-250°C. These ranges provide a starting point, fine-tuning depends on the specific printer and environment.
Bed temperature matters too. PLA works fine at 50-60°C. ABS requires 90-110°C to prevent warping. PETG performs best at 70-80°C. Setting the bed too hot can cause “elephant foot” on the first layer, where the bottom spreads wider than intended.
Cooling fans affect print quality significantly. PLA loves cooling, run fans at 100% after the first few layers. ABS hates drafts and needs minimal cooling to prevent cracking. PETG falls in between, usually performing well at 30-50% fan speed.
One of the most practical 3D printing tips is to create and save profiles for each filament brand and color. Even the same material from different manufacturers can behave differently. A profile that works perfectly for one brand of PLA might cause issues with another.
Optimize Print Speed and Temperature
Speed and temperature work together. Printing faster requires higher temperatures to ensure the filament melts fully. Printing slower allows for lower temperatures and often produces cleaner results.
Most beginners print too fast. A speed of 40-60mm/s produces reliable results for most materials. Going faster, 80mm/s or above, requires a well-tuned machine and appropriate temperature increases. Pushing speed without adjusting temperature creates weak layer adhesion and under-extrusion.
Temperature towers help find the sweet spot. These test prints show how a filament looks at different temperatures in a single print. Look for:
- Clean overhangs without drooping
- Minimal stringing between features
- Strong layer adhesion (layers shouldn’t separate easily)
- Smooth surface finish
Retraction settings control stringing. When the print head moves between points, retracting the filament prevents oozing. Start with 5-6mm retraction distance at 25-45mm/s retraction speed for Bowden setups. Direct drive extruders need less, around 1-2mm.
These 3D printing tips about speed and temperature require some experimentation. Every printer behaves slightly differently, and environmental factors like room temperature and humidity affect results.
Maintain Your Printer Regularly
3D printers are machines with moving parts. They need regular maintenance to perform consistently. Neglecting maintenance causes print quality to degrade over time.
Clean the nozzle regularly. Partial clogs cause under-extrusion and inconsistent flow. Cold pulls (also called atomic pulls) remove debris from inside the nozzle. Heat the nozzle, push filament through, let it cool slightly, then pull it out quickly. The filament should bring debris with it.
Lubricate moving parts every few months. Linear rails and lead screws benefit from light machine oil or PTFE-based lubricant. Avoid WD-40, it attracts dust and gums up over time. Smooth motion prevents layer shifting and improves surface quality.
Check belt tension periodically. Loose belts cause:
- Ringing artifacts on surfaces
- Dimensional inaccuracy
- Layer misalignment
Belts should be tight enough to “twang” when plucked, like a guitar string. Too tight causes motor strain: too loose causes quality issues.
Replace the nozzle when needed. Brass nozzles wear out, especially when printing abrasive materials like carbon fiber or glow-in-the-dark filaments. A worn nozzle produces inconsistent extrusion. Keep spare nozzles on hand, they’re cheap insurance.
These 3D printing tips for maintenance extend printer lifespan and ensure consistent quality across hundreds of prints.
Troubleshoot Common Print Failures
Even with good preparation, prints sometimes fail. Knowing how to diagnose problems saves time and filament.
Warping happens when corners lift from the bed. Causes include:
- Bed not hot enough
- Poor bed adhesion
- Drafts or temperature fluctuations
- No enclosure for ABS
Fix warping by increasing bed temperature, using adhesion aids, or adding a brim to the print.
Stringing creates thin threads between parts of the print. This indicates the nozzle is oozing during travel moves. Increase retraction distance, lower print temperature, or enable “wipe” and “coasting” settings in the slicer.
Layer separation means layers aren’t bonding properly. This usually points to printing too cold or too fast. Increase nozzle temperature by 5-10°C or reduce print speed.
Under-extrusion shows as gaps or thin lines in walls. Common causes include:
- Partial nozzle clog
- Incorrect filament diameter setting
- Extruder tension too loose
- Worn extruder gear
Elephant foot appears as a bulging first layer. The bed is too hot, or the nozzle is too close. Lower bed temperature or increase Z-offset slightly.
Applying these 3D printing tips during troubleshooting helps identify root causes quickly. Most problems have straightforward solutions once the cause is clear.


